- Support & Knowledge Base
- LIBERO G
- Getting Started
How to start a new run and re-configure LIBERO Gx
1. Put LIBERO Gx in STOPP Mode
If you would like to re-configure LIBERO Gx, you will first need to put the logger into stopped mode.
- If your LIBERO Gx is currently in transit, press Start/Stop button for 3 Seconds. Your LIBERO Gx should now show ARRIVED.
- Press Start/Stop button for 3 seconds again. Your LIBERO Gx should now show STOPPED.
2. Start a new run
There are two possibilities to start a new run on LIBERO Gx.
On the one hand, the logger can be restarted via elproCLOUD and on the other hand, the logger can be restarted via the device itself.
2.1 Start new run in elproCLOUD Software
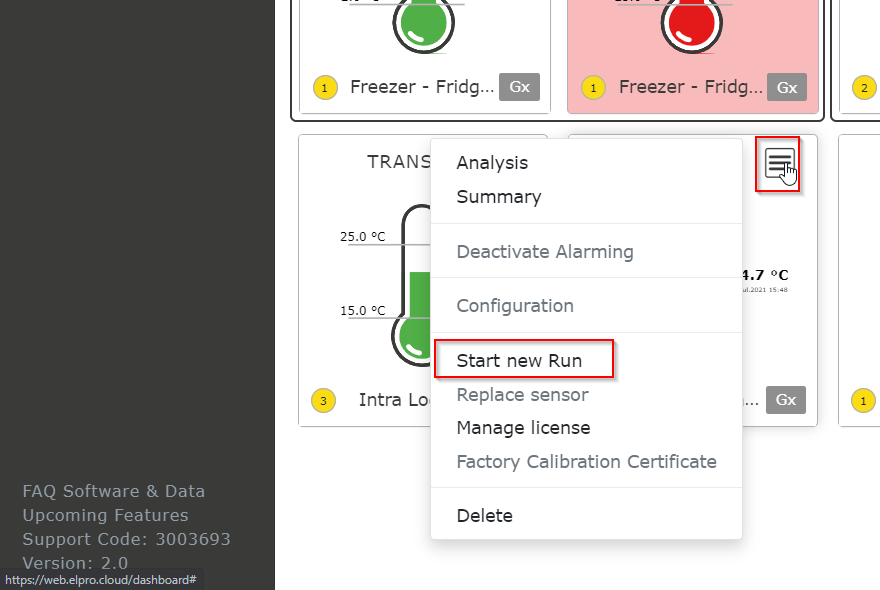
- New runs can be configured in the dashboard via the sensor menu
 .
. - Select Start new run in order to configure the new run.

2.2 Start new run on the device
- Press the Start button for 3 seconds to bring LIBERO Gx from the STOPPED state into the START state.
- Press the Start button again for 3 seconds to start a new run manually.
- The prerequisite for starting the device manually is that the checkbox “Allow new run by START button when stopped“ in the configuration settings has been selected.

3. Re-configure your LIBERO Gx
Follow the same steps to re-configure your LIBERO Gx as you did when you set-up your Logger the first time. You can read how to configure LIBERO Gx in this article.
